Sunday, 28 April 2013

Finally!

I am chuffed to say/show that I have finally finished TWO projects this weekend that have been hanging around for AGES! In fact one of them was started around three years ago...oops..

The first one I decided to attack was to alter a stripy dress I'd bought from a charity shop last year. I loved the colour and stripes but the shape didn't really suit me..Stick of rock anyone? 

I cut off part of the bottom, using the stripes as a guide and hand stitched (as I don't have a machine needle for jersey fabric yet) the hem whist watching tv!

L-R The original dress, now after cutting off a big piece can be worn either as a shorter dress or as a skirt!

I'm really pleased with how it has turned out. I think I prefer the skirt version - or will at least need something over the top of the dress (or under it for a bit of a 'boost' ;-). I even put my sun hat on in the hope that this will mean we will now get some sunshine!!

In fact I have the large off-cut to make into something else - so will have a play around with that..any ideas?

Off-cut - what shall I make with this?
I'll share my other project tomorrow...can't have too much excitement in one day! ;-0


Friday, 12 April 2013

The Shirt Scarf

My sewing adventures have been perked up somewhat by the arrival on our screens of the BBC2 programme - The Great British Sewing Bee. Hurrah! Are you watching it too? What do you think?

(plus that fact I was going to be giving a talk/demo on 'how many things can you make from a men's shirt?' - to a craft club - so I wanted to make a another thing to go with my current collection!)

So I got my machine out and wanted to have a play around and not be focused on making up a pattern. So going 'Freestyle' if you like!

Looking at the pile of shirt off-cuts I have - I thought I know! I'll make a scarf! I'd seen some patchwork kinda scarves recently so thought I would have a go at making my own. 

First I chose my colours. I had three to start with - but then decided I would stick to the two - stripes and plain. And would use a nice orange thread to jazz it up a bit. 

What to do with these off cuts?
Then I looked at the scarfs I already had to decide on the width and length. I went for 18inches / 45cm for the width - and length wise decided to see how I went until I got the length I liked - or ran out of material!.

So I ironed and then cut a load of 'panels' of different depths..

laying out the panels
And laid them out in a rough design. Made me think of a cityscape so had a bit of a play when sewing on the panels..

Experimenting with a 'cityscape' design
plus I made it so that it could be worn either way - so one side looks 'deconstructed' so can have two different looks. (I'll post a pic of me or someone wearing it when I get a decent picture!)

Finished scarf - side 1
Finished scarf - side 2
the 'rough' or deconstructed side...

'deconstructed' side
And I used the shirt plackets to add weight and a finished edge to the scarf..

Using the shirt plackets to finish the ends

It did take me a good few hours as I enjoyed trying different stitches and I did press each seam after joining each panel. If everything was cut out and ready then it would be a nice quick project I think! 

Only thing is - I don't think the colours suit me! So might end up using it as a table runner instead...will def make another one now though - using blue stripe shirts I think. ;-)


Saturday, 9 March 2013

A date at The Fashion Museum in Bath

The Bath Fashion Museum is 50 years old
A few weeks ago I took myself on a 'date' (if you've read 'An Artist's Way' by Julia Cameron - you'll know all about these kind of outings) They are an opportunity to take yourself off somewhere you want to with only yourself to please!

So I decided to go to the Bath Fashion Museum.

If you are a BANES resident you can apply for a discovery card and that gives you free access to this museum - as well as lots of other things! So it's well worth getting one.

This isn't actually somewhere I would have gone prior to starting this project - but thought it would be an interesting place to visit and see what they had on display. I didn't take the audio tour on this occasion as I just wanted to have a looksee!

The museum is housed in the basement of The Bath Assembly Rooms on Bennett Street and I was surprised by how much there is actually to see there and learn. Seeing that I do have a rather short attention span - I looked at the things that stood out for me this time - and will go back to look at things in more detail! Here's just a few of the things that caught my eye...

2011 Dress of the Year  
The Dress of the Year 2011

The website says: 
'One of the stunning gowns which sparked a media frenzy over who would design Kate Middleton’s wedding dress has been unveiled as the Dress of the Year 2011 at Bath & North East Somerset Council’s Fashion Museum. 

The ivory tulle bodice of the dress is fully embroidered with 3D organza feathers. Each feather is individually hand crafted, fully or partially embroidered with silver and white thread and bullion. The gown has an organza skirt consisting of 31 panels, hand embroidered with miniature eagle motifs using silver and white bullion.'

Dress of the Year 2011 is from Sarah Burton's
Fall 2011 collection for Alexander McQueen
Sarah Burton designed Kate Middleton - The 
Duchess of Cambridge's Wedding Dress    

It was a shame I couldn't actually get any closer to the dress to really see and appreciate the details - and see what a '3D organza feather' actually is!

17th Century Gloves

These leather gloves also stood out due to the unnaturally long fingers. They are from the 17th century and the exaggerated long, slender fingers were to meet the fashionable ideals of the period.  Those with “average” fingers tend to be functional, work gloves! 

So they really conveyed your standing in society and said that person didn't have to do any work with their hands. 

The gloves are part of a collection currently on display - which all have the most amazing intricate embroidery detailing on them.

There were also shoes and other accessories on display!

1970s Dress

Then I spotted this 1970s dress mainly due to the fact I liked the neckline! And it made me think of the dress I'm currently trying to make and whether or not I can 'mix and match' the patterns to make something more like this....


I've also seen on the website that you can book a 'study session' to look at particular items in more detail which I think would be a brilliant thing to do and something I will do next time I plan on going there.

oooh and I also had lunch at The Bertinet Bakery & Cafe - they do the most AMAZING almond croissants!


A very interesting afternoon out!

I'm already planning where to take myself on my next 'date'!

Have you taken yourself anywhere recently? Where did you go and what did you do?

Sunday, 24 February 2013

Dress-aster?

I've gone a bit quiet as I've had a bit of a holiday, but that doesn't mean things haven't been happening..! 

I've been working on the toile (still) for the dress and have stopped as I've hit a bit of a problem...


The dress toile so far...
A. It is too small! (even though I checked the measurements and the pattern is for a size 14 (1970s original)  the top part of the dress is too tight on the waist - the skirt part fits ok-ish although I think once a zip goes in, it will be too tight! (oops - I've been eating too many cakes?!) 

Although I do know that sizes today are different to what they were in the 70s and what was a 14 then is more like a 12 now? I think that's right? In fact I do find that whole thing equally interesting, about how we are all getting bigger as a nation - but I'll save that for another post!

B. I'm not sure that the top part actually suits me even though I love the sleeves I'm just not quite convinced they look right on me...(sad face)

C. There is a big 'puff' thing on the back. I'm not sure why yet! I did find it fiddly to sew the sections into the top and keep them flat so maybe that's what's caused it?? Any ideas?


Puff! Umm not sure why? Thought it would be flat?
On the pattern it only shows the front, but really can't imagine that this is what it is supposed to look like? 

The pattern..

So looking at it now I'm also not sure if the fabric I had in mind would suit this patterns now either? As the skirt is made of four panels that means the pattern will need to match up. 

I am now wondering whether to change the top part of the dress and use a different pattern to make that part and then match that up with the skirt and actually put the zip in the back of side instead. 

Hmmm is sounding like a completely different dress!! What do you think?? Can I do that?


I'm really pleased though that I made a toile first to find these 'challenges' before going straight into the proper fabric and now work out how to solve them. All a big learning curve for me. ;-)

Could do with some advice/ideas please...!

Thank you!


Sunday, 10 February 2013

A surprise colour and Winston Churchill's underpants

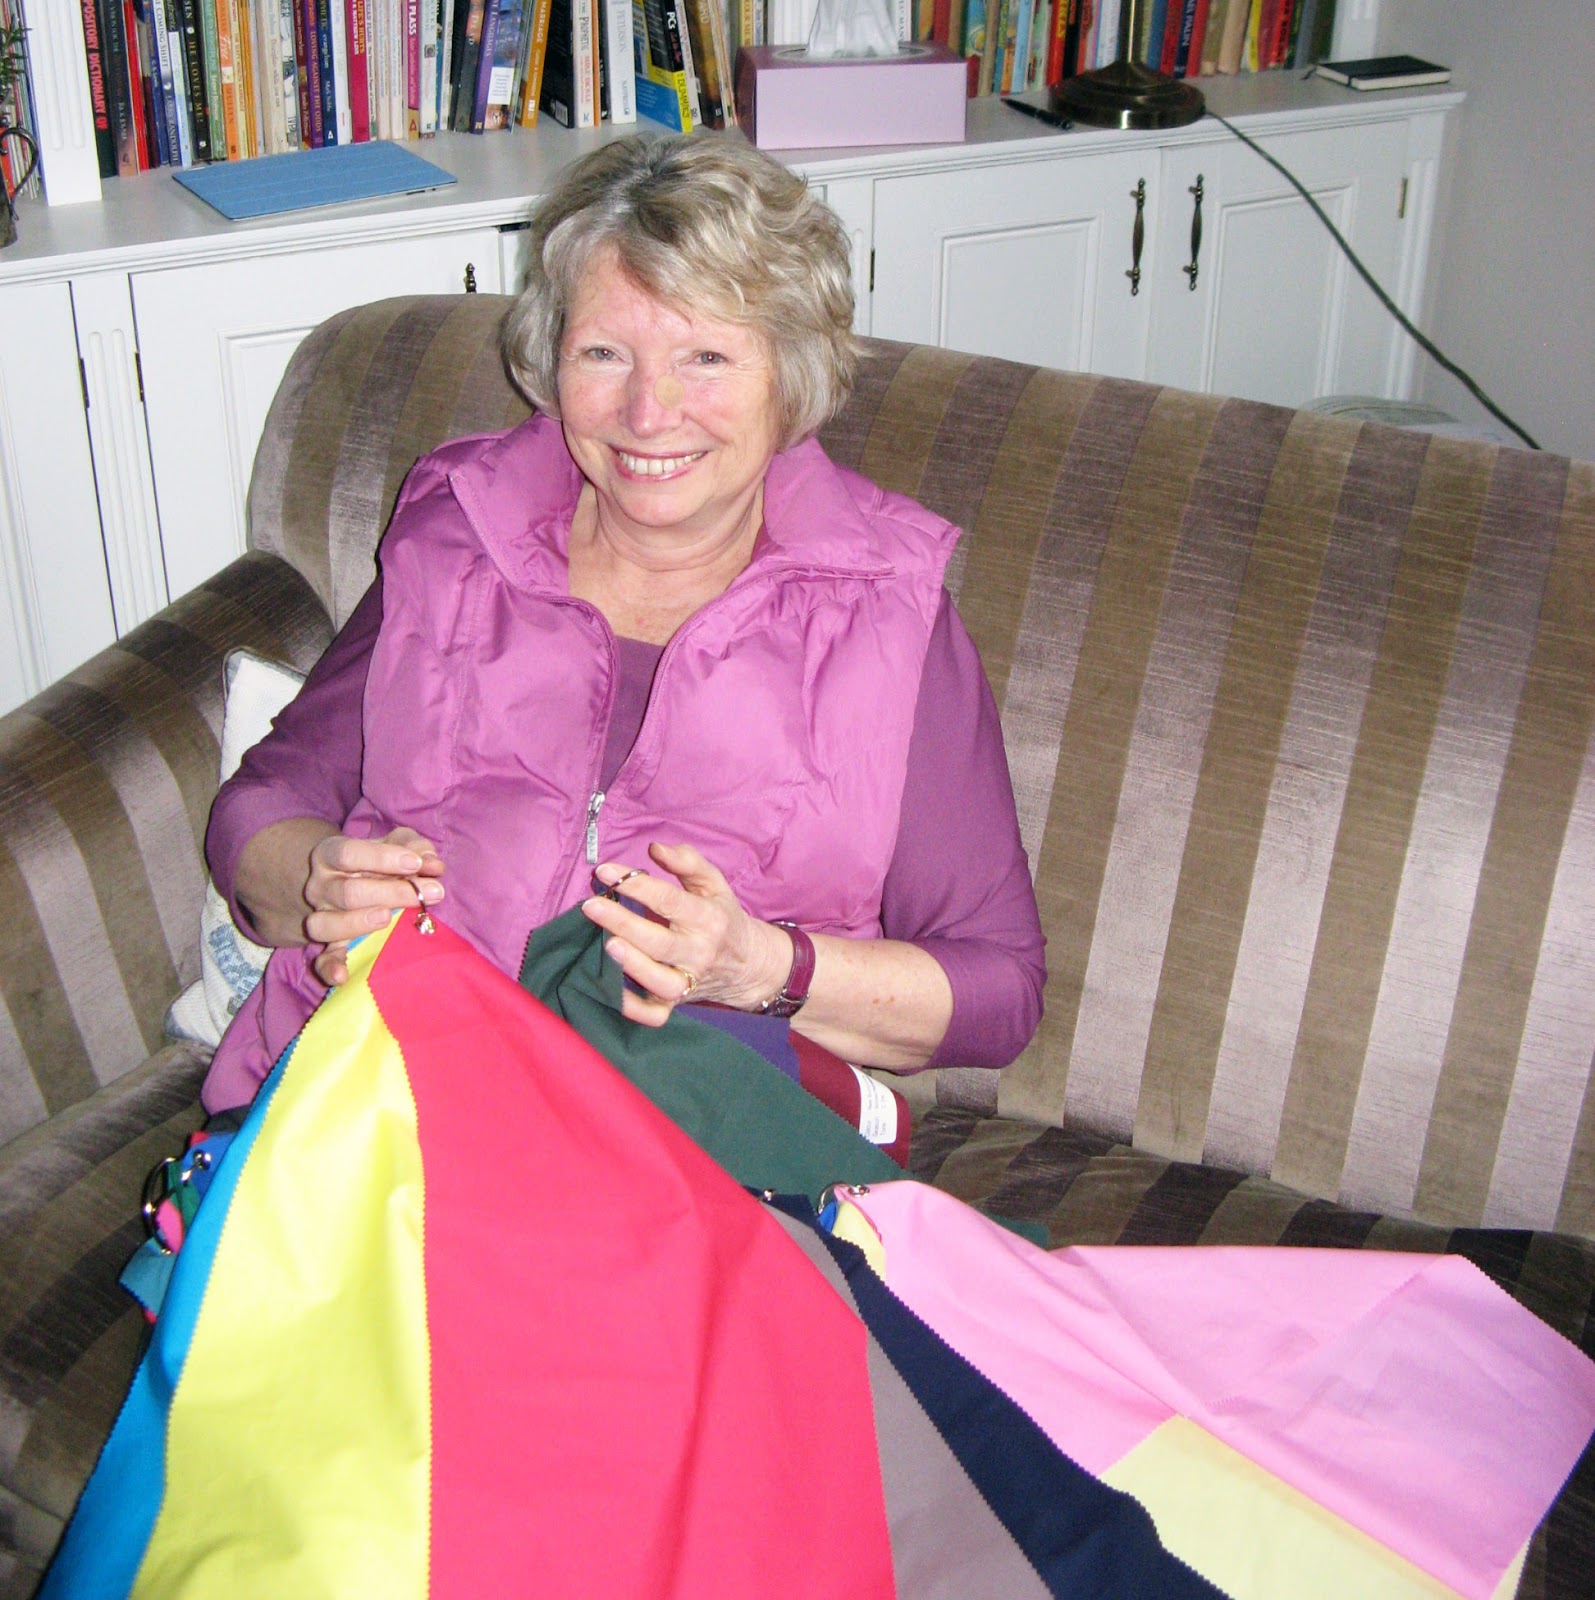
Last Friday I was lucky enough to go and have my colours done by a super fun and lovely lady called Hazel. 

I met Hazel at a talk I gave the previous week - and it turned out we had lots in common!! (including always having lots of ideas and not always really knowing what to do with them! ;-)

Hazel - the 'colour' lady

At the start of this project, you might remember, I tried to work out my colours by using the internet and managed to discover I was a 'clear winter' (you can read about that here) - but having a real live person trained in colour analyse to actually show me these colours against my skin and to discover other colours I could wear was invaluable (and good fun!)

Teal - no thanks!
Hazel confirmed that I am indeed a 'clear winter' and going through the process of putting the different colours next to my skin I could actually see the difference. 

Certain colours - those which I would describe as 'muddy' (with a yellow undertone e.g certain oranges and khaki greens etc.) would make my skin look sallow and my eyes dull, where as the bright 'crisp' colours (with blue undertones like turquoise, red, bright yellow etc.) really brightened my skin making it look clearer and made my eyes stand out more. 

Once I could actually see the difference it was quite obvious!!  

Turquoise - Yes please!
Not quite sure if you can see the difference in these photos?? Hope it conveys the different tones of some of the colours I tried?

I think one of the best and most surprising colours I discovered that I can wear was Taupe (note: Not beige!!) 

That's a colour I would has passed by and never really considered wearing - but seeing it against my skin I could see that it's actually a really smart base colour that can be dressed up with any of the other bright crisp colours that Hazel showed me.

I also discovered that a bright yellow also works and again - seeing it against my skin could see the difference. 

Eugh - khaki's not for me
I really enjoyed spending time with Hazel (who is a very inspiring lady) and it was fun discovering some new colours. 


I think it's really worth doing and it's certainly something that's going to help me as I continue with this project. 

But what has all this to do with Winston Churchill's undergarments I hear you cry??

But glorious dark green is..
Well, it turns out that Hazel's mother-in-law, Rene, worked as a seamstress during the war and was working in a clothes factory where they made and repaired uniforms.  As part of her work she was once asked to repair Winston Churchill's underpants!!

The Bath Chronicle wrote an article about Rene in which she said: 

"During the war the motto was 'make do or mend', and even Winston Churchill adopted that. 

He used to send his underpants to the factory where I worked, and one of us girls working there had to mend them for him."

You can read the full article here (I thought Rene sounded really inspiring especially when Hazel told me that for her 95 birthday she had a cocktail party!!)

Taupe - my new friend!

If you live in the Bath area and would like to have your colours done with Hazel you can contact her on 07786 077352 or email woodwardhazel@gmail.com

And you can read about how Hazel's business got started here

Thank you Hazel! ;-) x

If you don't fancy going and having your colours done - why not have a go yourself? 

Saturday, 9 February 2013

The joy of discovering new places


Today we went to Frome in Somerset. Wow!

What a fascinating place and a real Aladdin's cave for all things vintage and crafty!! I love going to new places and finding delights like this!

My photos don't really do the place justice - with it's winding streets and old signs on the buildings. But hopefully you'll get the idea...

Went in to this shop...


Lots of delights!


and bought some lovely vintage trimmings for £5


ZoĆ«, the lovely lady working there (who is a fashion designer and has her own eco-label called 'collect-me' which you can read about here) very kindly gave me lots of tips about where to get information about natural dying and some other blogs to look at that I might find helpful as part of this project!! I just love it - you never know who you'll meet!

Also found some short stay toilets. Couldn't find the long stay ones though....;-0


Wednesday, 6 February 2013

I can't believe I've made Butter!

Not sewing related, but wanted to share!!


We've recently joined The Community Farm's Supermarket Free Challenge - which you can read about here and the guidelines here.

I joined the farm as a volunteer just before Christmas - and thought seeing that I'm promoting this challenge - I can't very well not do it myself! I promise that this blog won't be taken over with foodie posts - but I guess it does all fit together with the sewing project too? It's all linked to sustainability, re-learning traditional skills and enriching different areas of daily life? 

I'd seen a clip of the Fabulous Baker Brothers on TV a while back where they had made butter. And since signing up to the supermarket free challenge - I remembered this and fancied having a go. I found a link to this 'How to' on the Guardian  and after posting about it on Twitter - was send this link by the lovely 'Margo Darling' who is in pursuit of 'The Good Life' which you can read here.

So inspired by this I had a go...

And it was GREAT!

Here's what I did: 

You need some double cream (this was bought from a farm shop) a jam jar and some salt. Make sure the cream is at room temperature - this means you don't have to shake it for so long. I used half a 285ml pot as I was just seeing if it worked first of all - and the jam jar wasn't very big! (you can make bigger amounts with a food mixer).


Shake, shake, shake (shake your booty, shake your booty! - as 

KC & The Sunshine Band would say!


It will make a sloshing sound to start with and then after about 5mins it will stop sloshing and you'll notice that it has 'thickened' And it will look like this!!


I added a bit of salt at this time and gave it another shake. 
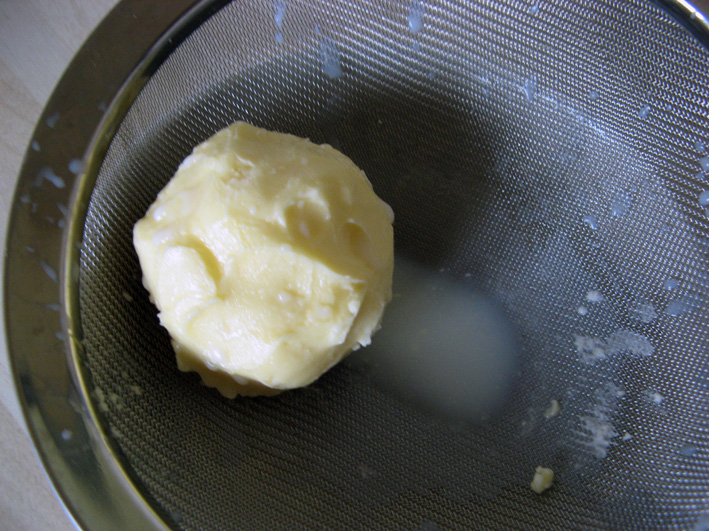
Then pour out into a sieve. Looks like scrambled egg!


Squeeze, squeeze, squeeze out the buttermilk! This can be saved and used in bread - or drunk apparently?? We put it in some bread. If you leave the buttermilk in the butter it will turn sour and taint the butter. 

Looking more butter like now... You can see the buttermilk at the bottom..


I tasted it - creamy - but needed more salt - so added a bit more..

Then washed in cold water and started to shape it - did two 'cold water' washes. 
A mini butter pat!


That's it!

Homemade butter!!


It was ridiculously easy, quick and immensely satisfying!

Was quite a small pat so it didn't last long...! 

Why not give it a go?