Saturday, 9 February 2013

The joy of discovering new places


Today we went to Frome in Somerset. Wow!

What a fascinating place and a real Aladdin's cave for all things vintage and crafty!! I love going to new places and finding delights like this!

My photos don't really do the place justice - with it's winding streets and old signs on the buildings. But hopefully you'll get the idea...

Went in to this shop...


Lots of delights!


and bought some lovely vintage trimmings for £5


ZoĆ«, the lovely lady working there (who is a fashion designer and has her own eco-label called 'collect-me' which you can read about here) very kindly gave me lots of tips about where to get information about natural dying and some other blogs to look at that I might find helpful as part of this project!! I just love it - you never know who you'll meet!

Also found some short stay toilets. Couldn't find the long stay ones though....;-0


Wednesday, 6 February 2013

I can't believe I've made Butter!

Not sewing related, but wanted to share!!


We've recently joined The Community Farm's Supermarket Free Challenge - which you can read about here and the guidelines here.

I joined the farm as a volunteer just before Christmas - and thought seeing that I'm promoting this challenge - I can't very well not do it myself! I promise that this blog won't be taken over with foodie posts - but I guess it does all fit together with the sewing project too? It's all linked to sustainability, re-learning traditional skills and enriching different areas of daily life? 

I'd seen a clip of the Fabulous Baker Brothers on TV a while back where they had made butter. And since signing up to the supermarket free challenge - I remembered this and fancied having a go. I found a link to this 'How to' on the Guardian  and after posting about it on Twitter - was send this link by the lovely 'Margo Darling' who is in pursuit of 'The Good Life' which you can read here.

So inspired by this I had a go...

And it was GREAT!

Here's what I did: 

You need some double cream (this was bought from a farm shop) a jam jar and some salt. Make sure the cream is at room temperature - this means you don't have to shake it for so long. I used half a 285ml pot as I was just seeing if it worked first of all - and the jam jar wasn't very big! (you can make bigger amounts with a food mixer).


Shake, shake, shake (shake your booty, shake your booty! - as 

KC & The Sunshine Band would say!


It will make a sloshing sound to start with and then after about 5mins it will stop sloshing and you'll notice that it has 'thickened' And it will look like this!!


I added a bit of salt at this time and gave it another shake. 
Then pour out into a sieve. Looks like scrambled egg!


Squeeze, squeeze, squeeze out the buttermilk! This can be saved and used in bread - or drunk apparently?? We put it in some bread. If you leave the buttermilk in the butter it will turn sour and taint the butter. 

Looking more butter like now... You can see the buttermilk at the bottom..


I tasted it - creamy - but needed more salt - so added a bit more..

Then washed in cold water and started to shape it - did two 'cold water' washes. 
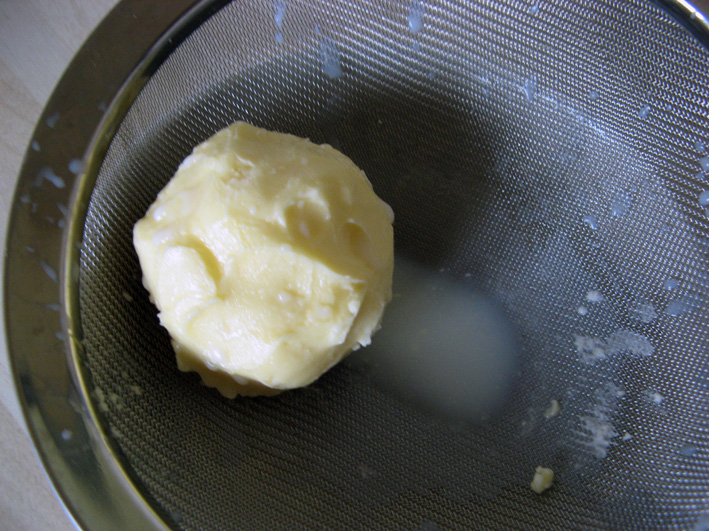
A mini butter pat!


That's it!

Homemade butter!!


It was ridiculously easy, quick and immensely satisfying!

Was quite a small pat so it didn't last long...! 

Why not give it a go? 


Monday, 21 January 2013

Sewing satisfaction

I've done it! I've finished my nightshirt! Hurrah - AND it passed the 'being slept in and not falling' apart test *phew*

Here it is...

The finished nightshirt!
I'm really pleased with how it has turned out and the fact that I didn't have enough of the green stripe fabric - was actually a blessing as I used shirt fabric off-cuts to add the detail. 

The mismatch buttons - I found in the tin of buttons I was given by my fellas mum. 

And I feel so satisfied!

It may seem a small thing - but I actually finished it.

I am known to start things in a flurry of excitement only to loose interest halfway through and abandon a project..

So that's another reason I feel quite pleased with myself!

And during this process - which took two weeks in the end of doing a little sewing and often - with a few days in between of no sewing - due to the fact am in the process of a house renovation so am allowing that!


I've learnt lots of new things!

These are (in no particular order):

  • How to make a pocket
  • How to use the buttonhole foot on my sewing machine and that my machine has a 'bl' error code which stands for button lever - and that my machine has one that has to be engaged for the buttonhole foot to work (thank you google)
The special buttonhole foot
  • How to use a twin needle which I used on the arm cuffs
  • About the importance of constantly pinning and pressing (even if it feels like a phaff - it's so worth it)
  • Taking my time.  As soon as I start to get frustrated with the sewing/project - to stop and do something else! It took me three goes to do two of the six buttonholes as for some reason my machine kept getting 'stuck' but I got there in the end after lots of unpicking and trying again.
Sewing the buttonholes
  • To ask for help! Thank you to Joelle and Sue for the help with getting a neat and flat collar as part of the first sew-a-long we had last week. (This would have prob. been about the point I would have abandoned a project in the past!)
Messy collar - before!
Neat collar - afterwards!
  • Clipping seams! (applies to collar comment above)
  • Having the support and encouragement from all the super people who have joined me on this 'journey into dressmaking'! So thank you!
  • Measuring the fabric before starting - and not just *thinking* there will be enough. Although it has turned out well really as I used up other bits of shirt fabric I had around the house. 
  • Having to adapt the pattern as I didn't have enough fabric to make long sleeves - so made short ones instead
Using fabric I had around the house for the 'detail' bits
  • Making things yourself is very satisfying. And to take a few moments to say 'I Made That' and be pleased with yourself - is a good thing to do!!
  • This nightshirt didn't cost me any ££s to make - I already had everything I needed! It cost me in 'time' but I think that was time well spent.
  • That I can do it, it was fun and I'm excited about making my next item!


Back view of the nightshirt


Thursday, 17 January 2013

The joys of a sew-a-long and a neat collar!

We had our first virtual sew-a-long on Tuesday evening from 19.00 - 20.00 - and I think it was brilliant! 

An hour just wasn't long enough. So next week we'll do it from 19.00 - 21.00. 

It was a very simple idea - at 19.00 on Tuesday - we (fellow LWYW challengers) 'checked in' on facebook to say hello and what we were working on. Then we went away and worked on it - some posted photos and Joelle was very kindly 'on hand' to offer any dressmaking advice. 

Which I needed! 

It meant I was able to sort out my collar on the nightshirt  It had gone a bit 'weird' and I wasn't quite sure what to do about it..So at the start of the sew-a-long I posted a photo of the collar and asked for some advice. Here's what it looked like:

Messy interfacing on the collar - (before)
Then both Joelle and Sue advised I needed to 'clip my seams' and press them - so off I went to do that. I actually cut out a fair amount - it made a HUGE difference. I pressed it then and it was flat! Hurrah. 

Then seeing as I hadn't created a hem - I used a fancy stitch to sew it in place....which looks like this!

A neat collar! 
Am so chuffed with how it's looking now! I have also sewn up the side seams and chosen my buttons. Next is to make the sleeve cuffs, make the button holes, add the buttons - then ta dah!

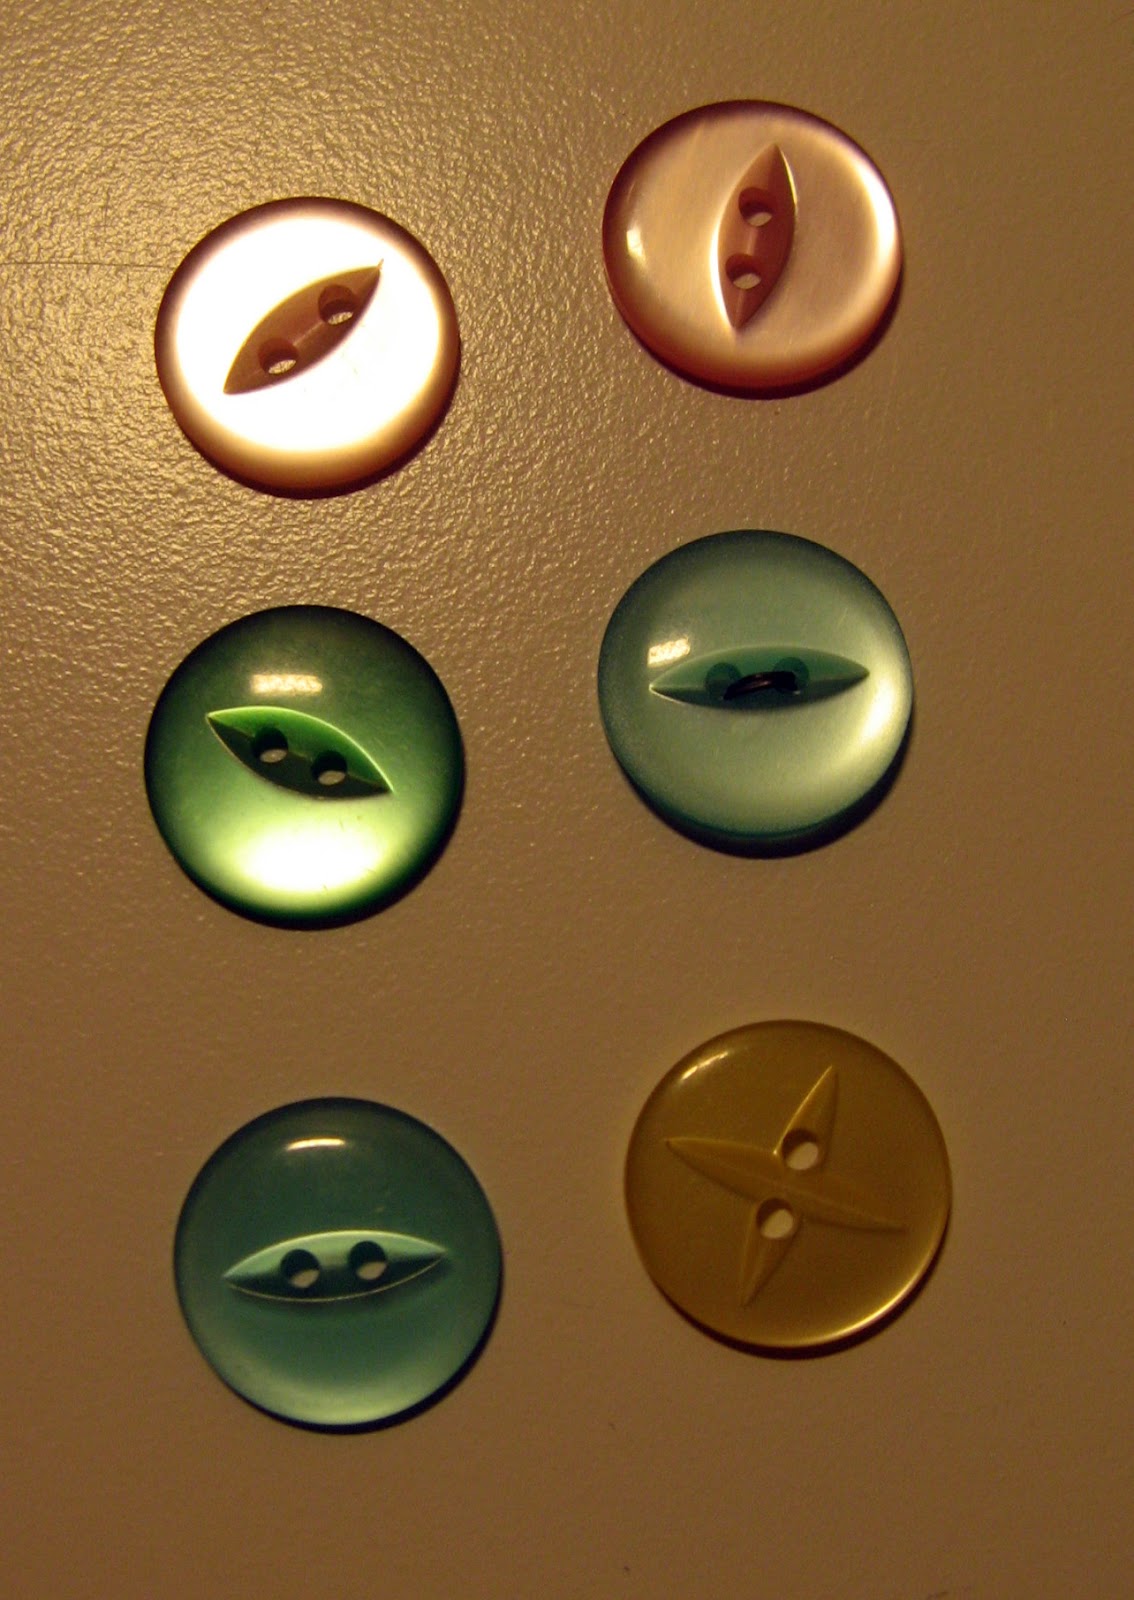
Buttons for the nightshirt
The buttons I've chosen from the massive tin I was given are smaller than the ones shown on the pattern - but I liked the colours and think they will work (hopefully). I do need to find my button foot now though!

From what I could see - everyone who took part in the sew-a-long got something out of it! So I'd say Sew-a-longs rock!

To see what everyone else has been up to - visit the Facebook page here!  Some really great things happening! 

And of course the pinterest page to see what had been made so far!! I get so inspired by seeing all this creativity as well as reading fellow LWYW-ers blogs. Love it!

Sarah Davy posted about what she achieved during the first sew-a-long here.

Amazing what you can do when you set aside a bit of time. 

So same time next Tuesday! 

Looking forward to it already. ;-) 

Friday, 11 January 2013

Little and often, that's my new motto

Sewing in the collar
I am making progress on my nightshirt and it's going well. Hurrah! I'm really enjoying it and actually look forward to the next step! It's rather exciting seeing it taking shape! 

So this week I committed to doing something - no matter how small - on this project each day. 

The collar!
The only day I didn't do anything was on Tuesday - but that's because I was out all afternoon and in the evening was learning how to make bread! Which was Brilliant!! (check out The Square Food Foundation, Bristol, where I did the class - I really recommend them!)

Anyway - back to the nightshirt! So I am currently up to step no.6 of 14!

I have actually (for once) followed the instructions - well ok I haven't used interfacing. But that's the only thing. Time will tell if that makes a big difference.

This week I have learnt: 


how to make breast pockets - and use a template to get a round(ish) edge - don't look too closely!

Put in a collar. At first I thought I was sewing it in the wrong way - but pinning everything and checking it really has helped 

Been creative as I mentioned in the last post - I didn't actually have enough fabric and cut out one of the front interfacing panels the wrong way around - so have used bits of fabric to make them long enough - has a bit of a Dr.Who look about it wouldn't you say?

I have pinned in the front interfacing ready to be sewn, and once I have done that will sew in the sleeves, make the cuff bands for the sleeves, sew up the hem, make button holes and add the buttons. Then it will be finished! I already know what I want to make next!! 

Doing it this way has certainly made it more manageable for me personally and not so overwhelming/scary!

How are you getting on with your projects?

Getting creative as I didn't have enough fabric!
First sewn on pocket! with umm *nicely* rounded
corners...that's going to take practice me thinks!!


Monday, 7 January 2013

A night shirt, sore knees and a mention in Pretty Nostalgic magazine!

The pattern I'm using from Sew Magazine
I have *finally* started to make something from a pattern! *hurrah* I hear you cry (about time!) So after not actually getting very far with making an A-line skirt which was originally my first item I was going to make - I decided to start with a night shirt. Then if it did go horribly wrong at least only my fella and the cat are likely to see it!

I dug out an old copy of Sew magazine which had a free night shirt pattern with it. It said 'easy for beginners' so thought it would be perfect. It also requires buttons so would give me the chance to have a go with the different button stitches on my sewing machine. 

So yesterday afternoon - I made a start. 

I've decided to make the medium size one so it is nice and roomy to sleep in. 

I carefully cut out the tissue pattern pieces. Then pinned to the fabric - which I'd ironed - and cut out the fabric pieces. I hadn't actually measured the fabric, so soon discovered that there wasn't actually enough to make the long sleeve version!! - so am making a short sleeve version instead (well it is nearly summer...;-)  So that was the first lesson I learnt. Don't trust your eyes!

Then I pinned it all together! And realised I'd cut one of the inside collar pieces the wrong way around. So that meant I didn't have enough fabric left over to cut another one. So I improvised. I have used some contrasting shirt fabric instead. I think it's looking a bit more funky as a result.  

The fabric I've used for the main body of the night shirt was given to me and wouldn't have been a pattern I would have bought - but I think with the different colours and patterns I like it now. I'm going to use a selection of different buttons as well. I did think it looked a bit like an overall before adding the different coloured fabrics!!

How it looks so far!
This evening I have sewn and pressed the pockets - which was a bit fiddly and haven't quite managed to get a very smooth round edge on the bottom of the pocket.  I guess that takes practice?  Would really appreciate any tips. I made a template out of card as the pattern suggested, but found the steam from the iron kept burning my fingers when I tried to fold in small bits at a time to make a curve.  Apart from that am feeling rather pleased indeed with how it is looking so far!

The pockets - getting a neat rounded corner has been fiddly even with a card template...hoping when I come to pin them to the front I'll be able to neaten them up a bit more.
As for sore knees! Well, when I knelt down on the carpet today - ouch - my knees hurt! 'ah' I thought - am I just getting old or is there such a thing as dressmakers knee? Obviously all that time spent cutting out the fabric on the floor had hidden costs!! Maybe I'll make myself some padded knee protectors next!! ;-)

And - welcome to new joiners! Stephanie - who joins us all the way from California - our furthest a field joiner so far and welcome to Emma who has joined after reading about the project in the latest issue of Pretty Nostalgic Magazine! which hit the shelves today! *very exciting* Thank you so much for the lovely mention!!


Wednesday, 2 January 2013

Here's to a colourful 2013 - full of creativeness!


Here's to an exciting 2013 everyone!!

I stopped making new year's resolutions a long time ago as I never stuck to them... For example; one that's been on my list for years is to learn to play my guitar! So this year I'm looking for things more 'long term' - I'm of course going to be continuing with this project - along with the rest of you lovely Love What You Wear folks! Hurrah!  And I do have some other things I'd like to do too like - finish my personal coaching course, spend at least two weeks on an art placement somewhere and have a pop-up shop - which will have workshops run by different artists, as well as myself. That's just three of a very long list!!)

So back to this project - for myself really, I'm just going to recap here what my goals for this project are:

Things I’m going to make
  • A skirt 
  • A maxi-dress 
  • PJs 
  • Summer Linen Trousers 
  • An evening dress 
  • Three summer tops 
  • Crochet a shawl
  • Knit some socks
  • Make some knickers! (I know I’d excluded underwear from this challenge – but figured I’d have a go!)

Things I’ll have a go at
  • How to use the button foot on my sewing machine
  • Freehand machine embroidery
  • How to crochet
  • Improve my knitting and be able to follow a pattern
  • Dying with natural plant dyes
  • How to make my own patterns
  • Spin some yarn from a real live animal! Doesn't have to be a sheep! 

Anything else I do will be a bonus! (and if you've been following you might have seen that so far I've been good at collecting all the materials together but have yet to make anything. Although my jumper2cardi is nearly finished!

How about you? How are you doing with your list? And is there anything different you want to try in 2013 that wasn't on your original list? Share below!

Plus! I'm looking forward to meeting everyone who has joined me on this challenge at our celebration party in November this year!!